Prices generally start around $7 per ink pad for a “full size” pad which is generally 2” x 3”. Mini ink pads cost about half and are generally 1” x 1”, but contain roughly 20% as much ink as a full size ink pad. Ink pads can be made of a felt pad with linen cover or made of foam.
Dye ink pads are quick-drying. They can be either water-reactive or non-water-reactive. One common type of traditional, non-water-reactive dye ink pad is Stampin Up. The most common type of water-reactive dye ink is Ranger Distress by Tim Holtz. There are many brands of both types, including Simon Says Stamp, Hero Arts, and Altenew.
Most stamping is done with dye ink, whether water-reactive or not. Dye ink should be used for stamping an image to be colored with alcohol ink markers (e.g. Copic).
Pigment ink pads are slow-drying. Brands include Versafine (by Tsukineko) and Ranger Archival.
Hybrid ink pads have elements of both dye and pigment. They can be water-reactive (like Ranger Distress Oxide by Tim Holtz) or non-water-reactive. There are many brands, although most are non-water-reactive.
Alcohol ink pads are used for non-porous surfaces such as tile or plastic. The most common brand is Staz-On.
Embossing ink is a clear, sticky ink used for tone-on-tone stamping or embossing. The most common brand is Versamark.
Pigment, hybrid, alcohol, or embossing ink should be used for stamping an image to be colored with a water medium (e.g. watercolor paint.) Any sticky, slow-drying ink can be used for embossing, including pigment, hybrid, and embossing ink.
Manual die cut machines are human-powered and offer a platform with rollers. You crank a “sandwich” of cutting plate, die, and paper (or other material to be cut) through the rollers with a handle.
Basic pieces
machine
two cutting plates
multipurpose platform or adapter
die (shape cutter)
The standard cutting plates are a hard polycarbonate plastic. They are consumable, so they will need to be replaced periodically. Turn the plates over top to bottom, left to right, with every cut to reduce warping.
The multipurpose platform or adapter raises the cutting plates so you can use thin dies instead of steel rule dies.
You can successfully die cut with the basic pieces.
Optional extras
self-healing cutting plate
extended cutting plates
chrome precision base plate
metal shim
magnetic plate
silicone pad / impression pad pair
die brush
The standard cutting plates can be swapped for a self-healing plate on the cutting surface. These are available from scrapbook.com or iCrafter or you can cut your own from any self-healing mat.
Extended cutting plates are needed IF you have an extra-long die.
The chrome precision plate and metal shim may be useful for cutting detailed thin dies. You can also add paper or cardstock shims to your sandwich.
A magnetic plate will gently hold thin steel dies in place. You can also use low-tack tape.
The floppy silicone pad and softer (than polycarbonate) impression pad are used together to emboss (rather than cut) from a thin steel die.
A die brush or die pick can be used to eject small pieces of paper from cutting dies.
Dies and Embossing Folders
steel rule dies
thin steel dies
embossing folders
Steel rule dies are thick and heavy, 4 ounces or more, and cat cut chipboard, cardboard, or multiple layers of cardstock. New dies are quite expensive, generally $40 and up, and the only company still making these is Sizzix.
Thin steel dies are very thin, comparable to a few sheets of cardstock. Generally these should be used to cut a single layer of cardstock. These are widely available from many manufacturers and designers at a wide range of prices. Some thin dies are words or basic shapes, while others are made to cut out a co-ordinating stamped image.
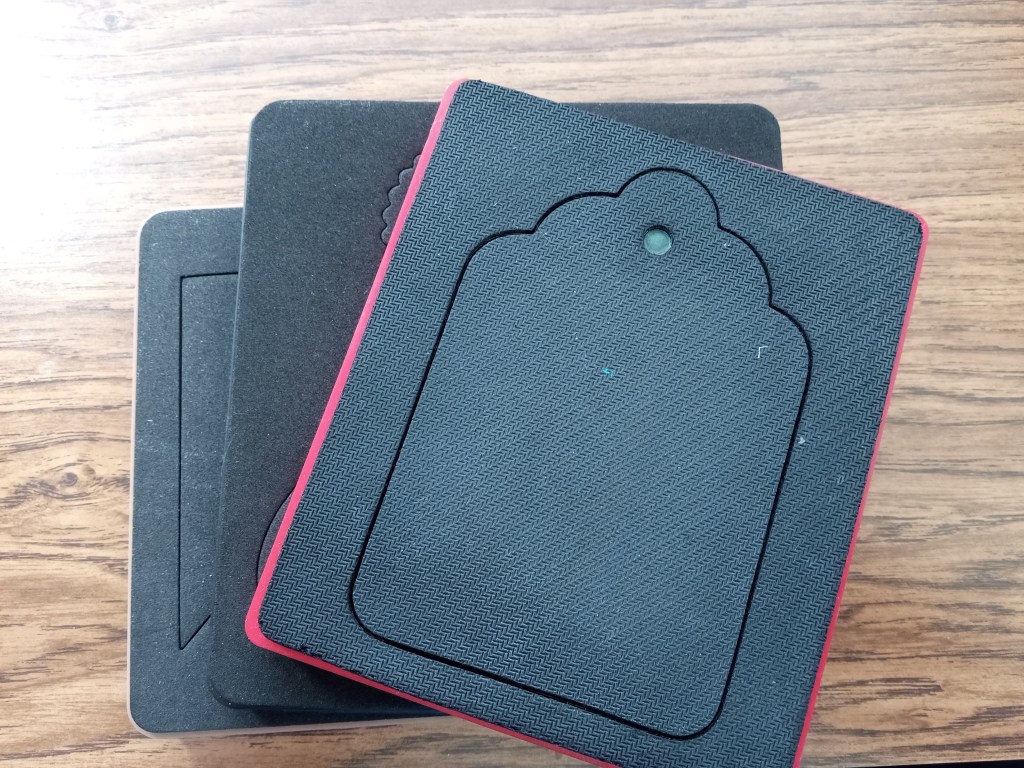
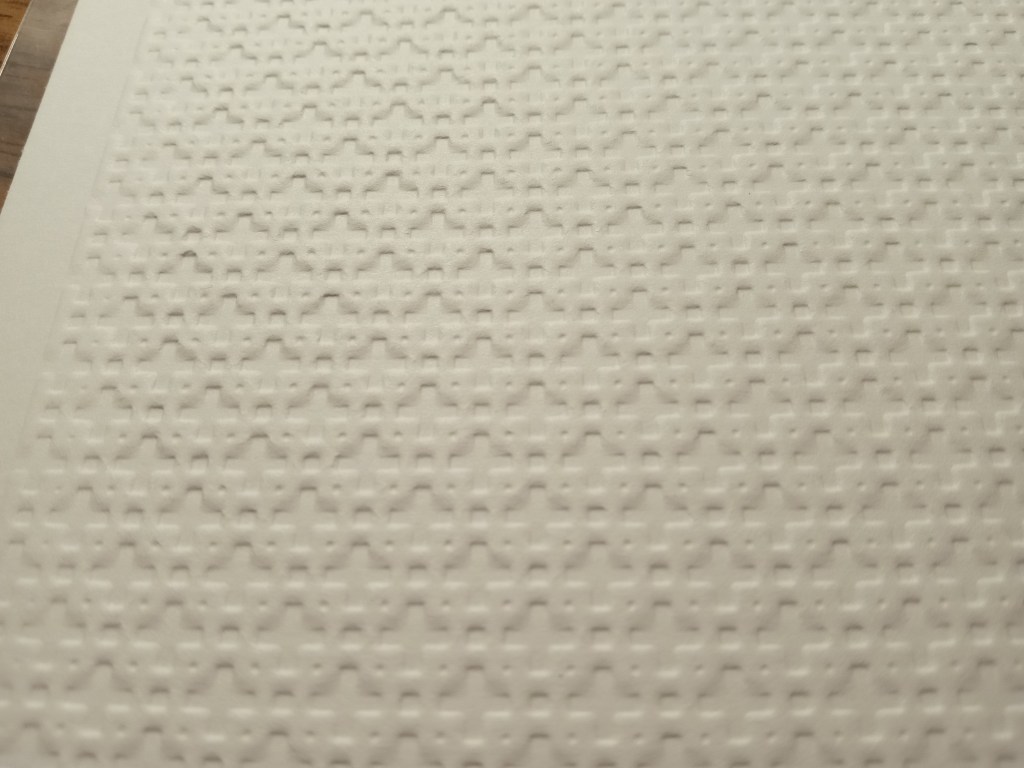
Embossing folders are two pieces of plastic, hinged, that have a positive raised image on one side and a negative debossed image on the other. You put a piece of paper between the two and run it through the die cut machine to emboss the image onto the paper. These are also widely available and inexpensive.
Manual machines use human power to put cutting plates or platform through rollers to apply steel dies to material such as paper, fabric, plastic, thin cork or leather. Dies cost extra, but are widely available from a range of manufacturers.
The originals, Sizzix and Spellbinders, can handle old-school steel rule dies that are about an inch thick, although only Sizzix continues to manufacture these at all. The Sizzix Pro can handle Ellison dies commonly found in schools. All of the machines in this category can handle thin steel dies. Spellbinders also offers a compatible foil machine.
The 6” opening will handle most dies.
The best machine is the one you already own or can find used for cheap, but if I were buying new I’d pick Spellbinders (either version) and haunt their website (spellbinderspaperarts.com) and scrapbook.com watching for sales. Sizzix is the one you are most likely to find used.
For a Sizzix Big Shot or Big Kick, if the handle turns then it works. In addition to the machine itself, you will need a pair of cutting plates (for thick steel rule dies) or a pair of cutting plates and a multipurpose platform (for thin steel dies) and a die. This is the Sizzix machine with a platform and one cutting plate. While the plate in the photo happens to be blue they most commonly come in clear:
The multipurpose platform should last the life of the machine, but the cutting plates do need to be replaced periodically.
Various colors and accessory packages are available, but these are the basic choices:
Sizzix
Big Shot – 6” opening, retail $139
Big Shot Foldaway – 6” opening, retail $229
Sidekick – 2.5” opening, retail $65
Big Shot Pro – 12” opening, retail $400
Spellbinder’s
Platinum 6 – 6” opening, retail original version $120 or improved version $200
Spellbinder’s foil machine available
We R Makers
Revolution – 6” opening, retail $150
Evolution Mini – 3” opening, retail $66
Heffy Doodle
Mini – 3” opening, retail $49
Momenta
Freestyle – 6” opening, retail $100
Crafter’s Companion
Mini Manual – 3” opening, retail $50 (formerly Diamond Press)
Hero Arts
Compact Cutter – 3” opening, retail $50
Anna Griffin
Mini Manual – 3” opening, retail $60
Electric machines handle thin steel dies (all brands) or steel rule dies (Sizzix) and use electricity to move the plates through the rollers rather than human power. Gemini is the original here, but Anna Griffin certainly has some fans.
Sizzix
Big Shot Switch – 6” opening, retail $329
Big Shot Switch Plus – 9” opening, retail $400
Crafter’s Companion
Gemini Jr – 6” opening, retail $230
Gemini – 9” opening, retail $300
Gemini Go – 3” opening, retail $160
Gemini foil machine available
Anna Griffin
Empress – 6” opening, retail $270
Empress Mini – 4” opening, retail $180
Electronic machines use digital files and software to cut shapes. Some machines can draw. The Brother Scan and Cut can scan a stamped or printed image and cut it out, much like a matching steel die would.
Cricut Maker 12”, $249
Cricut Explore (next gen) 12”, $319
Cricut Joy 4.5” $179
Brother Scan and Cut not quite 12” $399
Silhouette Cameo (next gen) 12” $339
Silhouette Curio 12” $249
I understand Circut now requires an always-on wifi connection and monthly subscription; as always, carefully research before shopping.
For thrift store and garage sale shopping I would look for
Sizzix manual for under $50, including multipurpose platform
Steel rule dies – crafters abandon these because they are heavy and large, but new dies are $40 and up and used ones are treasure! Steel rule dies will cut chipboard, cardboard, or multiple layers of cardstock.
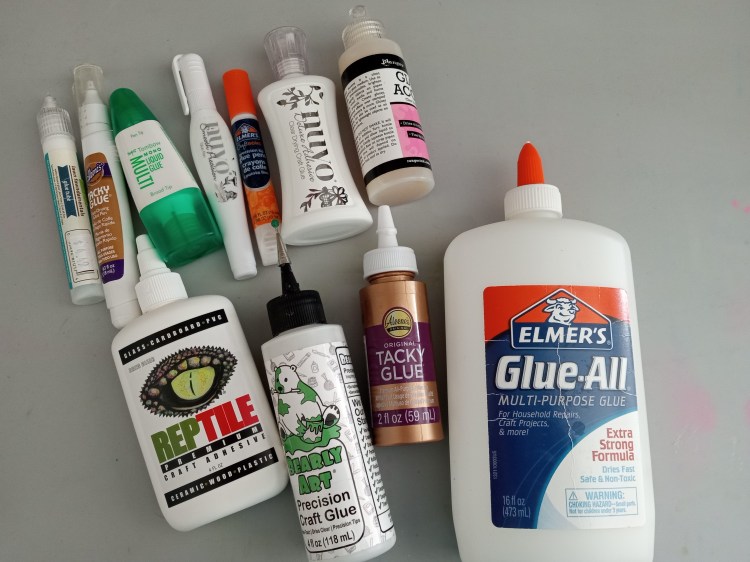
I compared the various glues I had in my craft room, inspired by Mary Palanco (https://youtu.be/DaaRhzmA0H4). Her test was great, but I was more interested in price per ounce than price per container.
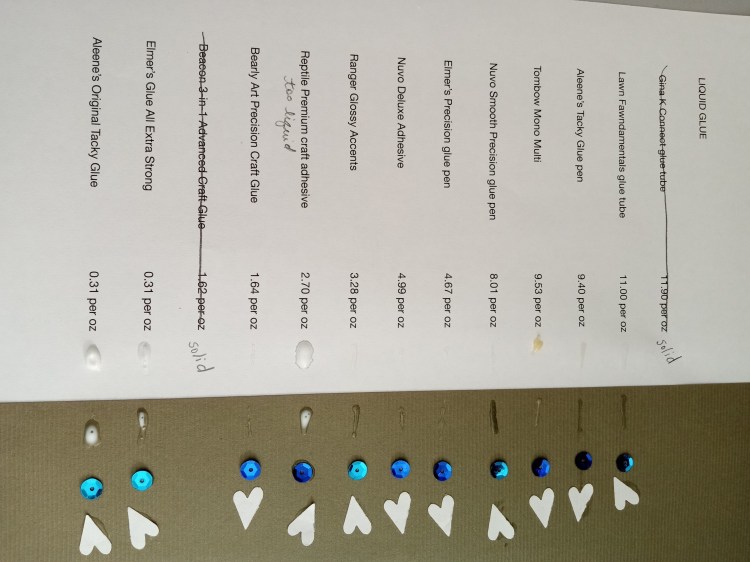
I tested 13 glues, all of them items I had and none bought for this purpose. The most expensive glues were glue pens or smaller bottles with fine tips, while the least expensive glues were large bottles with large tips.
I had to discard two glues that had solidified, probably from being stored unused but open for too long.
The expensive glue pens and slight less expensive fine tip bottles included:
Lawn Fawndamentals glue tube $11/ounce
Aleene’s Tacky Glue tube $9.40/ounce
Tombow Mono Multi $9.53/ounce
Nuvo Smooth Precision glue pen $8.01/ounce
Elmer’s Precision glue tube $4.67/ounce
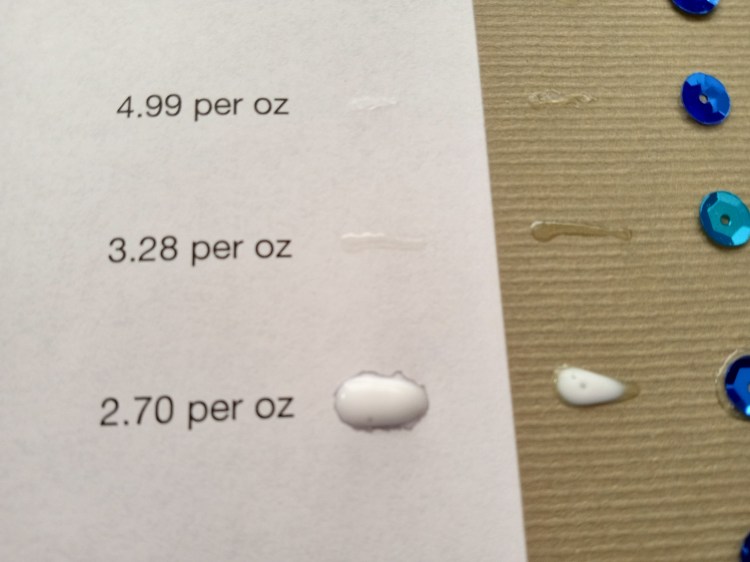
Nuvo Deluxe Adhesive fine tip bottle $4.99/ounce
Ranger Glossy Accents fine tip bottle $3.28/ounce
The less expensive, larger tip bottles included:
Reptile Premium Craft adhesive $2.70/ounce
Bearly Art Precision craft glue with fine metal tip $1.64/ounce
Elmer’s Glue All extra strong $0.31/ounce
Aleene’s Original Tacky Glue $0.31/ounce
I rejected the Reptile glue as too liquid for my purposes.
That dark ring around the glue is water. That just won’t work for me.
The budget option is to convert the large, inexpensive containers into precise delivery containers. The most common options I’ve seen are glue tubes (filled with a syringe) and one-ounce needle-nose bottles. The one-ounce needle-nose bottles are less work to fill in my opinion, so that’s what I’ve elected to use.
While my preference for normal glueing is Elmer’s or Aleene’s in a mini-bottle, there are some special uses for a couple of these glues.
Tombow Mono Multi remains tacky when dry. This can be useful for sticking unmounted rubber stamps to a block or stamping platform, or adhering a stencil to paper.
Ranger Glossy Accents remains shiny when dry. This can be useful for creating shiny elements on your project.
Reptile is surprisingly effective at adhering paper to plastic. I don’t know when that will come in handy, but I have not found any other PVA glue that can do that.
The one-ounce bottles are readily available, but the ones I’m using are from Amazon (affiliate link):