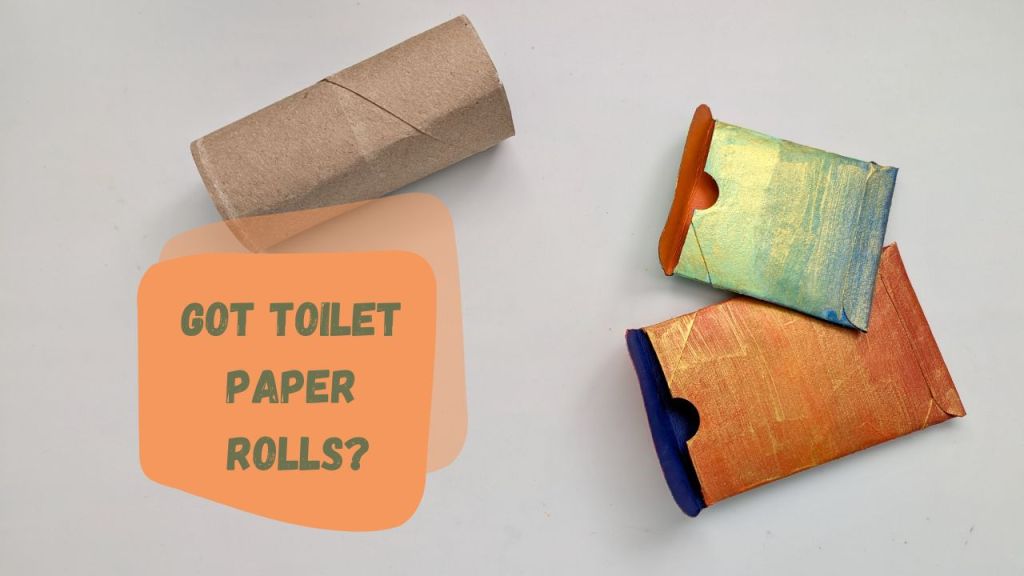
I used toilet paper rolls, paper towel rolls, and wrapping paper rolls to make the pockets. The paper towel and wrapping paper rolls can be cut long enough to hold an ATC or gift card.
Flatten the tube and mark 1″ from one end and 1/2″ from the other end. For longer paper towel and wrapping paper tubes, I used a length of 5 1/2″ overall. Cut a slit up to the mark on each side of the flattened tube. Fold up to the mark, then remove the flap at each end on one side. Fold up the 1/2″ flap and glue. Decorate as desired. I used acrylic paint for color, then painted with Crafter’s Square metallic acrylic paint from Dollar Tree.
Two ways to use Dollar Tree items to make easy shaped mini-albums
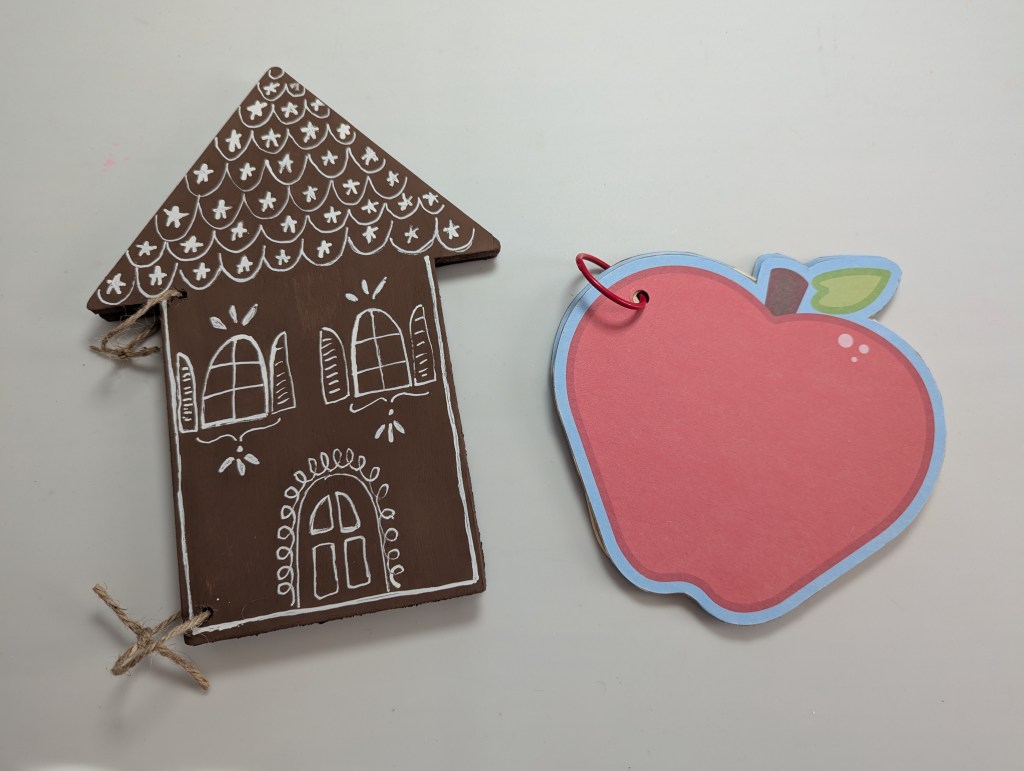
First we’ll use “shaped decor sheets” from the Teaching Tree line. I’m sure these are meant for a classroom bulletin board.
I applied a thin coat of Mod Podge in satin to a scrap piece of lightweight cardboard (I think it was from a pad of paper), attached an apple cutout, then coated with more Mod Podge. Once dry, I cut it out. I made two of these. To decorate the back, I painted the edge of the cardboard with acrylic paint that roughly matched the apple border, then applied a trimmed apple using Mod Podge, then coated with more Mod Podge.
Second we’ll use “wood hanging decor” from the Crafter’s Square line.
These don’t need to be backed, and by using two of the same the front and back match. I painted the house using Prang tempura paint in brown, then drew “icing” using a white acrylic paint pen.
For both, I traced the cover onto scrap cardboard to make a jig. I trimmed this a little smaller than the outline until I had page shapes that fit inside my covers. I used the jig to cut copy paper into page shapes. I marked the hole placement on the jig and used that to punch holes in the pages. For the apple decor sheets I used a 1/4 punch and for the house I used a 1/8” punch to match the hole in the wooden shape.
The “shaped decor sheets” can themselves be used as pages.
The Prang tempera paint and Mod Podge are a good price at Dollar Tree. The Prang is quite inexpensive compared to other retailers. The Mod Podge can be less expensive if you are willing to buy a much larger container, but I’m here to tell you that 16 oz of Mod Podge is a supply that will last a very long time.
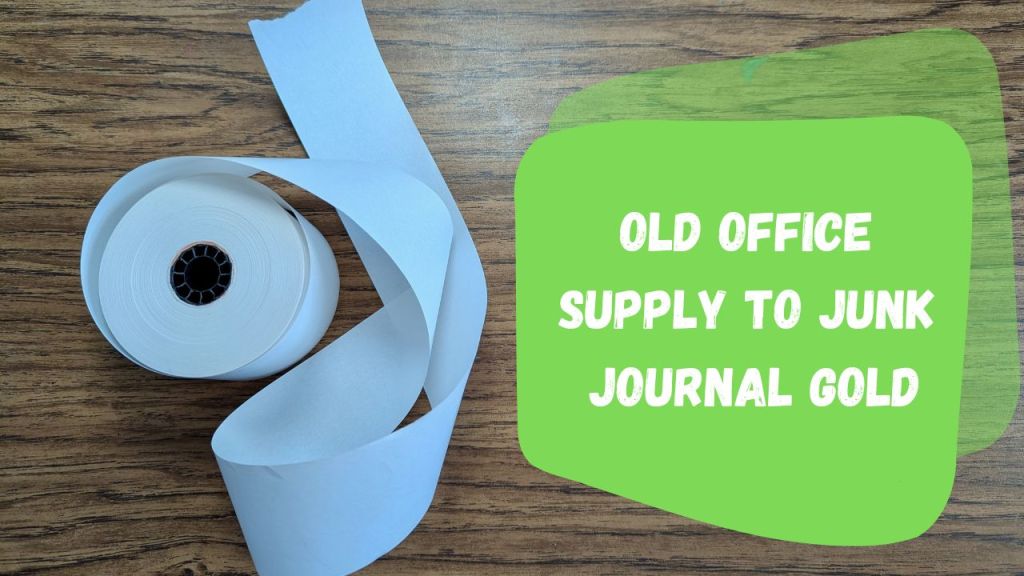
Calculator tape is meant to be used in a desktop calculator to print calculations, but I can’t remember the last time I turned on the tape in my own 10-key. I thought it would make a fun craft supply, so I used it to stamp and watercolor, make a paper ruffle, and make a snippet roll. All of these were much, much more fun than adding a column of numbers!
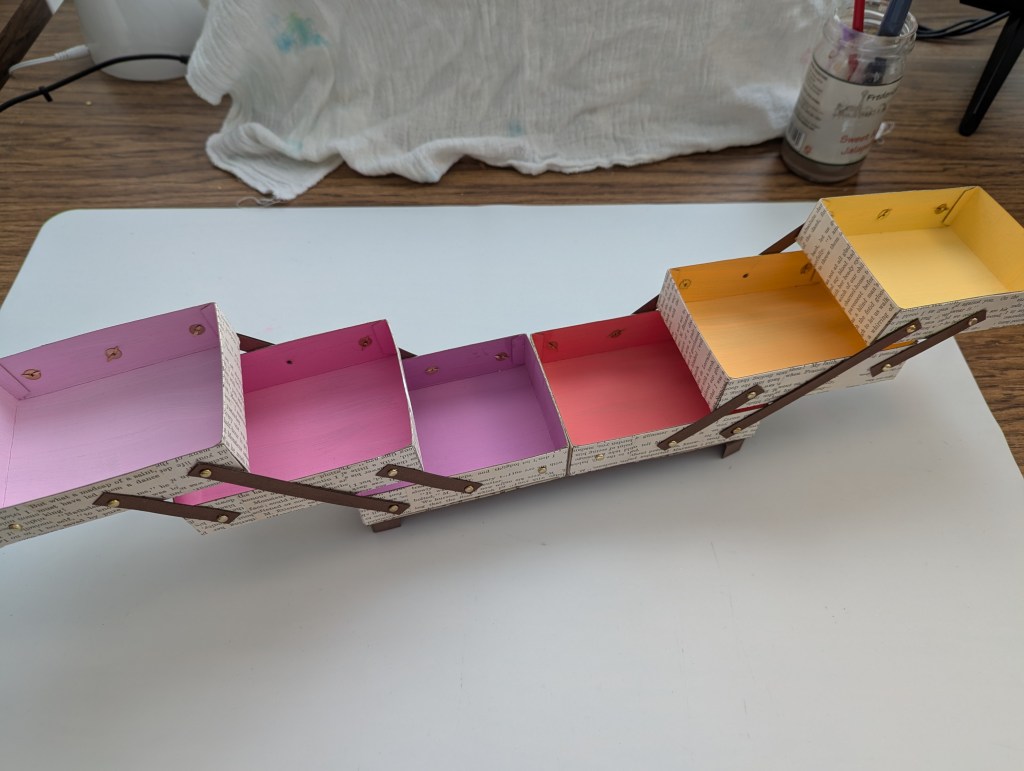
Easy-to-make cantilevered storage box, similar to a thread chest
Materials: 6 boxes, 12 strips, 36 brads
You will need six identical small boxes. These must be the type with a removable top or sleeve, like a jewelry box or matchbox. I’m making mine using the Sizzix Tim Holtz Curio Box die, but you can easily make these with no die.
To make a similar box with no die, cut lightweight cardboard into a rectangle 5” x 6”. Score around all four sides at 1”. Cut a slit at each corner at the score line on each long side. If you are making your own boxes, it’s easier to decorate and punch the holes before assembly.
Pierce each box in three places in a row on each long side. Use a 1/8” hole punch for mini craft brads. Carefully measure and mark so the holes are in the same spot on each box. The holes must the large enough to allow the brad to turn.
Next you will need 12 strips of cardstock or lightweight cardboard to make the mechanism. 8 will be shorter, joining two boxes. Four will be longer, joining three boxes. Stack three boxes and measure from the top left hole to the bottom right hole for the long strip, allowing a little extra on each end. Measure from the middle end hole to the middle bottom hole for the short strip, cutting eight.
Use the brads to join the strips to the boxes. The brad legs can’t be closed down too tightly, preventing movement. I know we normally use brads to join paper together so the impulse is to tighten those right down, but fight the urge!
Cut a base to set the stacked boxes onto. Measure the bottom of two boxes side-by-side to determine the size.
Add feet if desired. These can be cardboard or a large bead.
For my Curio Box Bigz die-cut boxes
The punched holes are at 1/2”, 2”, and 3 1/2”
The strips are 3/8” wide and 4 1/8” long (longer) and 2 1/4” long (shorter)
The legs are a 1” square of lightweight cardboard scored each way at 1/2”
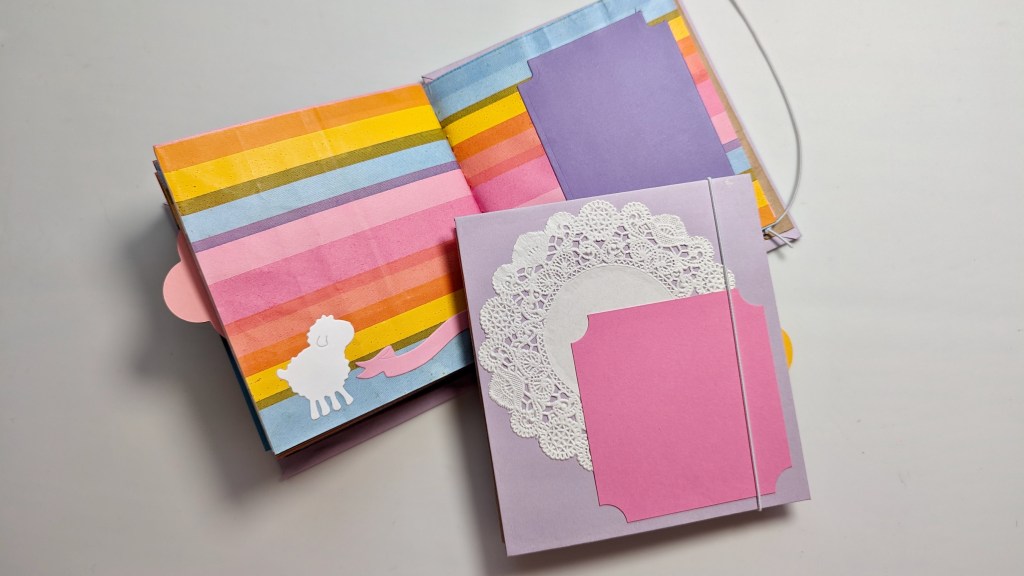
I’m using a package of 10 treat bags from Dollar Tree, approximately 4.5” x 9” from their spring 2024 line. These are similar in size to standard paper lunch bags, also described as a 4 lb bags. The advantage of the Dollar Tree treat bags is that you can buy a small number and they are decorative.
I added a little solid cardstock and copy paper in co-ordinating colors, one plain lunch bag (for the cover, you could also use a brown paper grocery bag), and some lightweight cardboard from food packages.
To build the book, cut the cardboard to 4 5/8″ x 5″ and cover using co-ordinating copy paper. Open the glued end of each treat bag and cut off at the last fold. Fold five treat bags in half and staple at the fold point. Cut the plain lunch bag or brown paper grocery bag to the same size as the trimmed-down treat bags. Glue the plain bag to the front cover. Temporarily hold the stack of treat bags against the front cover, fold the plain lunch bag over the stack, then glue the back cover to the plain lunch bag. This gives you an appropriate fold for the spine. Open the cover and run a line of glue down the center of the plain paper and place the stapled stack of treat bag pages down on the line of glue. Short process video: https://youtu.be/3f1pJy0Wh6E
Since I have dies, I decorated the pages with die cuts using the sets listed below. If you don’t have dies, any ephemera or stickers would be equally appropriate, or the treat bags are decorative themselves.
Sizzix Tim Holtz Curio Box with Framelits #664419 https://amzn.to/4ehOxpL Stampin Up Framelits Labels #125598 Spellbinders Celebra’tions by Richard Garay Pierced Word Bubbles SCD-023 Crafters Companion dies – advent calendar 2019, spring calendar 2020
The closure is 12” of elastic cord threaded through two eyelets. If you prefer a ribbon closure, attach the ribbon between the cover and brown paper as you assemble the book.
Prices are current as of the day I typed this out (obvs.) and do not include coupons, taxes, or shipping. Amazon links (if any) are affiliate, others are not. As an Amazon Associate, I earn from qualifying purchases. Or I would, theoretically, if anyone ever followed a link and bought something, which I do not encourage. Use your craft supplies!
Fun flip-flap folio with no dies, no complicated cutting or measuring, using materials you probably have right now.
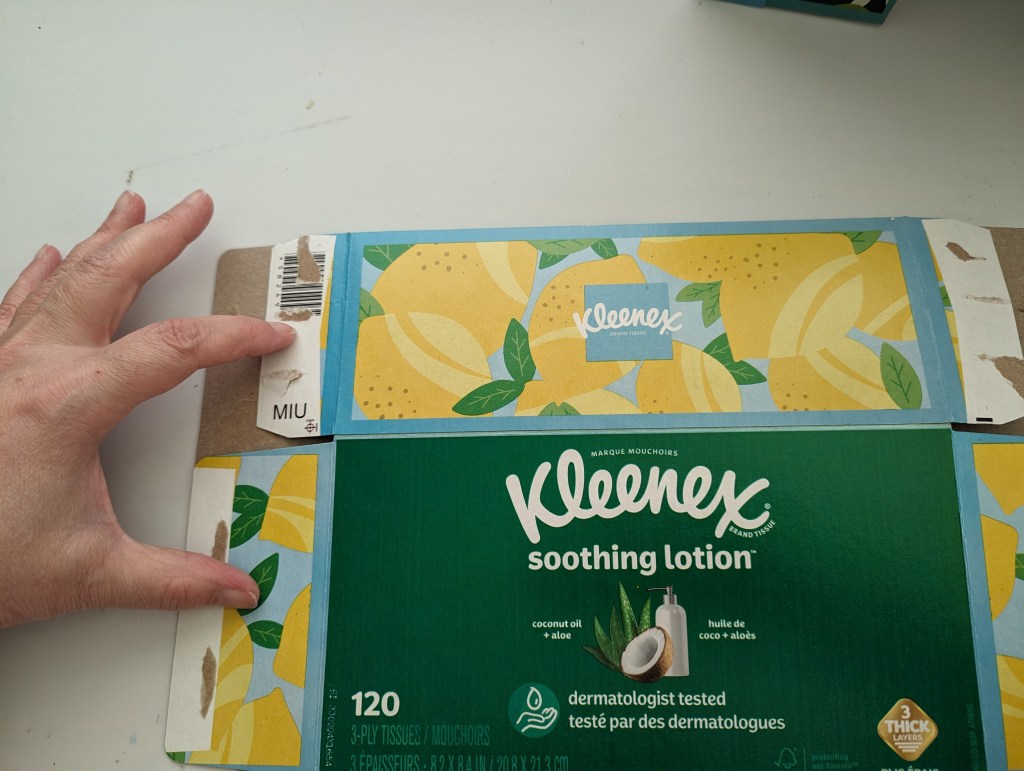
You will need two empty boxes from facial tissue with a center top opening. Kleenex has the right style, Puffs has a side opening that won’t work for this project. Additional supplies: two sheets of copy paper for hinges, scissors, glue, and whatever you desire in the way of decoration.
Open the empty tissue boxes at the short end. Cut off the four flaps on each end, saving the two larger flaps from each end, on each box. You will be saving eight larger flaps, each with some design on them. The eight smaller flaps with only printing registration marks can go into the recycling bin. Remove the clear film from the center and discard.
On the first box (lemon print in the photo) cut the smallest part of the tissue opening off. You will be able to open the box completely flat.
On the second box (blue print in the photo) cut at each fold line so that you have four sections – top, bottom, and two sides. Trim the long edge of each piece by about 1/4”.
Attach the sides of the second (blue) box to the flap from the first (lemon) box.
Hinge the top (blue box) to the bottom (blue) to the center of the folio (lemon box). You will need two hinges that are 8.5” long and about 2” wide. Fold each hinge in half. Attach one half of one hinge to the top and one half to the bottom so that they open like a book. On the opposite side of the bottom, the side with no hinge so far, attach a folded hinge to the underside. The other half of this hinge attaches to our folio.
Use hinges to attach the saved flaps (lemon and blue) in a waterfall pattern in the center of the folio (lemon). Do the waterfall last so it covers the hinge attaching the bottom/top “book” to the folio. The hinges for the waterfall flaps should be cut from copy paper and be about 4 1/4” long and about 1 1/2” wide. They can be narrower (less than 1 1/2” wide” but not wider or you will run out of space for the waterfall.
If you would rather not do templates, these are the measurements.
Library card pocket – 4” x 6” rectangle, mark 2” from bottom, from mark up to top cut off 1/4”. Card for pocket is 3 3/4” x 3 1/4”.
File folder – 4 3/4” x 6 1/4” rectangle, on one long edge mark 1/4” x 3 to cut out and discard. Score at 3” from side without tab.
Envelope – 5 1/4” x 6” rectangle. On each long edge, mark 1/4” from bottom and 1” from top. Remove corners.
Tag – 3” x 4” rectangle, mark 1/2” from two top corners and remove. Add 1/4” hole punch in center.
ATC card – 2 1/2” x 3 1/2” rectangle
Tab – 1 3/4” x 1 1/2” rectangle, use small (about 5/8”) hole punch at center line on each short edge, fold in center.
Polaroid frame – 3 1/2” x 4 1/2” rectangle with 1/4” edges on three sides and 1 1/2” edge on one side.
Paper bag – 4 1/4” x 5 1/2” rectangle, mark 1/2” on each long edge. Of that, remove 2 1/4” at top left, 3 1/4” at bottom right, and 1/2” at bottom left.
I’m using a Zutter Round-it-all heavy duty corner rounder which no longer seems to be available, but the We R Memory Keepers corner chomper is highly regarded
and really any corner rounder is going to be fine. These were huge in the scrapbooking days of the ‘90s so check garage sales and thrift stores. Here’s another new option that’s pretty low cost
Prices are current as of the day I typed this out (obvs.) and do not include coupons, taxes, or shipping. Amazon links (if any) are affiliate, others are not. As an Amazon Associate, I earn from qualifying purchases. Or I would, theoretically, if anyone ever followed a link and bought something, which I do not encourage. Use your craft supplies!
I’m celebrating my YouTube anniversary with a kit giveaway. Each kit is unique, although similar, with a variety of fun book pages, maps, vintage sewing pattern elements, die cuts, ribbon, and other embellishments. A good way to introduce some random extras into your junk journal for experienced crafters, or a good entry point for a new junk journal maker. There is a video overview of the contents here: https://youtu.be/mC0sXvsGn8Y
Please email me at crystal@papercraftcrystal.com to enter. I will select winners from email received by May 4, 2024, and then contact you by email for your physical mailing address. Open to shipping addresses in the USA and Canada.
Tips for beginners and experienced crafters looking for a crafty bargain
Non-shopping
Tell people you know that you’re getting started in card making or scrapbooking and looking for supplies. Tell the people at work, in your Sunday school class or synagogue or mandir, tell your book club or your PTA.
If you yourself are under 50, tell your mother to tell the people she knows, too. My own mother is an octogenarian so her social circle is no longer large, but women in their 50s and 60s know people, and those people craft.
Crafters love to give their less-loved supplies to other crafters (or school teachers or Scout leaders, people who will use them.)
Now, if you are an experienced crafter and you have a crafty circle of friends, how about a craft supply swap? Or make and swap embellishments? That’s a lot less calories than a cookie swap.
There is a lot of cross-over between the various paper crafts of card making, scrapbooking, party decorations, origami, and even painting so don’t stint on who you tell.
If you really want to embrace non-shopping, consider junk journaling. This is a craft that involves making your own book and pages out of found materials, like empty cereal boxes and junk mail. Since it requires no special supplies, it’s perfect for the beginner or the bargain-seeker. Every craft gives you the opportunity to spend money, of course, and this one will too in the form of purchased printables and vintage-style supplies, but you can be successful here with household supplies and no shopping.
Now, on to bargain shopping
Be selective
Have a plan and be selective in your shopping. No matter how cheap the price, if it’s not what you really want, not something you end up using, or not your style then it’s not the right purchase.
We’re going to discuss several strategies
category switching
dollar stores
secondhand
unusual sources
online general retailers
craft retailer clearance and sales
Category-switching
If you have ever bought anything for a wedding you know that sometimes the label is more closely related to price than the item. Not knocking the retailers, just want you to be aware of the pattern. The bigger the shopping audience the smaller the price. Look at the kitchen, office supply, makeup, and party supply areas.
Kitchen
baking mats are silicone, great for messy craft projects and a lot less expensive than craft mats
dough scrapers, cooking spatulas, basting brushes, and fondant molds all have craft applications
organizational containers like spice racks, lazy susans, risers, fridge bins
Office
scissors
rulers
post-it notes for masking
cardstock
permanent markers
organizational containers like paper sorters, magazine holders
Just a note here, if I were starting in scrapbooking today I would embrace the 8 1/2 x 11 size and use office page protectors.
Makeup
brushes and sponges for blending
face mask applicators
Party
Wrapping paper
Tissue paper
Wrapping paper is patterned paper. Look for heavy weight metallic and glitter wrapping paper especially.
Kids’ Crafts
This is a great area for basics, or to try out something new
Watercolor paint
Washable markers
Crayons – wax or gel
Glitter glue
Modeling paste
Air dry clay
Jewelry kits
Color pencils
Using watercolor as an example, I have an expensive Kuretake paint set and a set by Artist’s Loft. One costs $50 and the other $5. Is the $50 set nicer? Sure it is. Is it TEN TIMES nicer, and do I have the skill and interest to make it worth the price difference? Probably not.
Dollar stores
Even though not everything is a good deal even for a dollar, your local dollar store can still be a good source for some craft supplies. I would suggest checking for these items:
Basic tools, like small scrapers, craft picks, inexpensive paint brushes, craft knife, foam tape
Wrapping paper and tissue paper
Glue pens – larger containers are not a great price here, but glue pens (at 1 oz or less) are a deal
Different dollar store chains have different offerings.
Dollar Tree offers a craft section with patterned paper, washi tape, stamps, dies, and stencils. Their prices on air dry clay and jewelry findings are great.
Dollar General carries brush tip markers, patterned paper, acrylic paint markers, letter stickers.
Five Below has a good assortment of basics, but the unusual offerings are iridescent and pearlescent watercolor paint sets, multiple types of gouache, glow in the dark paint.
Daiso (only located on the west coast, Las Vegas, Phoenix, New York, and Texas right now) offers an array of stickers, washi tape, paper flowers, tiny envelopes, and origami paper.
Since I’m trying not to buy craft supplies, i generally avoid haul videos. I generally don’t watch them, and I never record them when I fall off the wagon and go shopping. However, these can give a good idea of what is offered by various retailers. Most people in the US have access to a Dollar Tree, but if you are considering whether it’s worth spending drive time to something further away then those haul videos can be helpful.
Secondhand
Thrift stores and garage sales can be hit or miss on craft supplies, but search for “creative reuse” and “art supply thrift store” to find more focused thrift stores. I will link in the description box to some lists of this type of store by location and a couple that are online.
I would be hesitant to buy used electronic anything, but if you are in the market for a mechanical die cut machine (e.g. Sizzix Big Shot) then keep your eyes peeled at the thrift store or garage sales. If the handle turns, it works.
Unusual sources
Grocery stores. Hey, you’re there anyway. Check the seasonal merchandise immediately before and after any holiday to pick up wrapping paper, garlands, paper napkins, gift bags and other clearance merchandise. Wrapping paper is pattern paper! Garlands and banners are embellishments! I love metallic and glitter wrapping paper for crafting. Grocery stores don’t have room to keep this stuff, so they discount hard and fast.
Hardware stores. Many a craft trend has started in the hardware store, including foam tape and drywall mesh. These are also a good source magnetic cups, used in auto repair, for storing small dies as you work. The Harbor Freight version is significantly less than the Spellbinders version.
Online retail
Overseas: This category is Temu, AliExpress, Wish, et al. These platforms operate much like third-party sales on Amazon, with the company providing a platform for many, many individual sellers. There can be issues with product quality, delivery, and customer service and there have been complaints of mishandling of user data and malware. There is a lot of intellectual property infringement and design theft. However, the price cannot be beat for basics like nesting shape dies or flower stickers.
If you would rather do business with someone in the US, check out Gina Marie Designs for rock bottom prices on dies https://wholesalecraftingsupplies.com
Amazon: This comes with its own issues, but anything by Sizzix or Stampers Anonymous that has been out for even a short while is generally less through those storefronts on Amazon than through their own website. You do need to calculate what a new email signup coupon might be worth and watch for sales at the retail websites, but Amazon gets the lowest price all the time. I notice these brands in particular because I’m such a Tim Holtz fan, but if you favor a particular wholesale line check it out on Amazon.
Craft stores
I’m going to give some counter-intuitive advice here, and that’s not to go straight to the clearance section. I may be projecting my own problems, so you do you, but I end up buying junk because it is cheap. Don’t be me. Be thoughtful and selective and buy WHAT YOU WANT. Be selective and have a plan.
When you have a plan, watch for coupons and sales, and don’t skip the email signup for the new customer discount.
Compare prices. You do it for gas and soft drinks, do it for craft supplies. Any brand that is sold by multiple retailers has multiple prices. I’ll go back to the Tim Holtz example. Simon Says Stamp carries everything he ever designed, so I’m going to watch their sales, but I’m also going to check Scrapbook .com, A Cherry On Top, and Amazon.
Craft stores also sell re-packaged, re-branded art supplies. Card-making did not invent markers, paint, or crayons so why not go to the source? The “store brand” behemoths for art supplies are Arteza and Dick Blick, and they make great products at great prices.
A fun scrap-paper embellishment that’s quick and old-school cool.
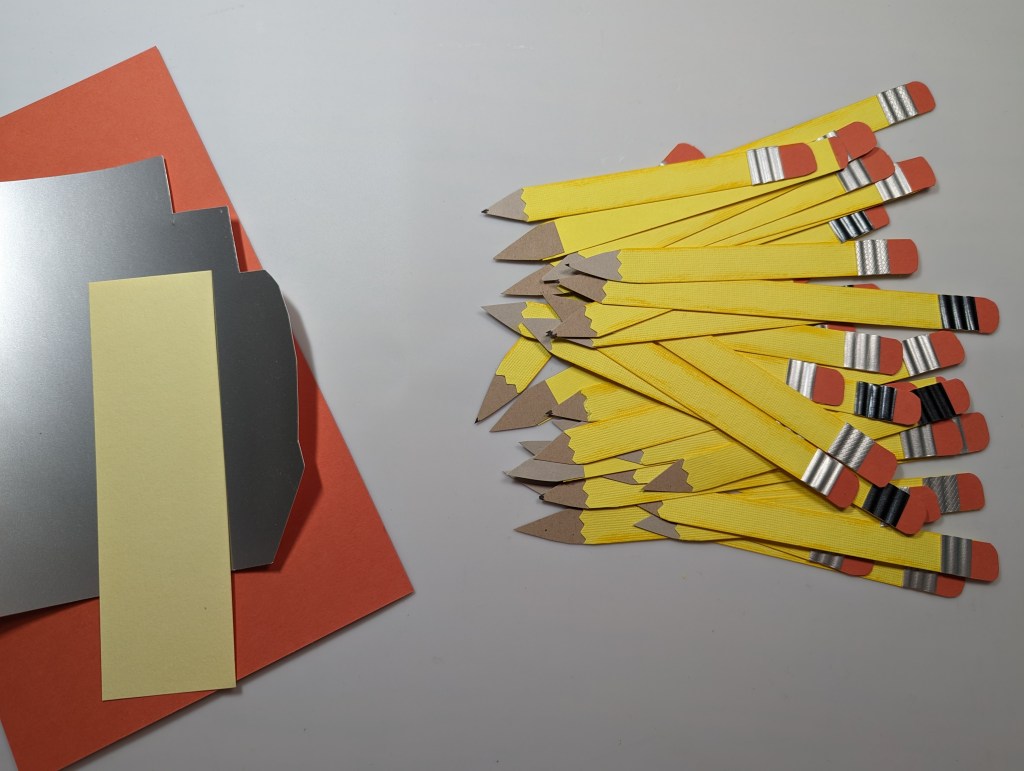
You’ll need some scrap paper in yellow, red-orange, silver, and tan. I used a paper crimper, decorative-edge scissors, and a corner rounder. You could substitute a score board for the paper crimper, and regular scissors for the decorative-edge scissors and corner rounder.
Cut the scrap paper into strips of the same width. Mine were 1/2” wide. Trim one end of the yellow strip with decorative-edge scissors, then attach a tan scrap at that end and a red-orange scrap at the other. Run the silver scrap through the paper crimper, then trim to a small piece and use it to cover the join between yellow and red-orange. Trim the tan end into a point, and color the point black. Ink the edge with darker yellow ink to suggest a round shape.